Purpose and location
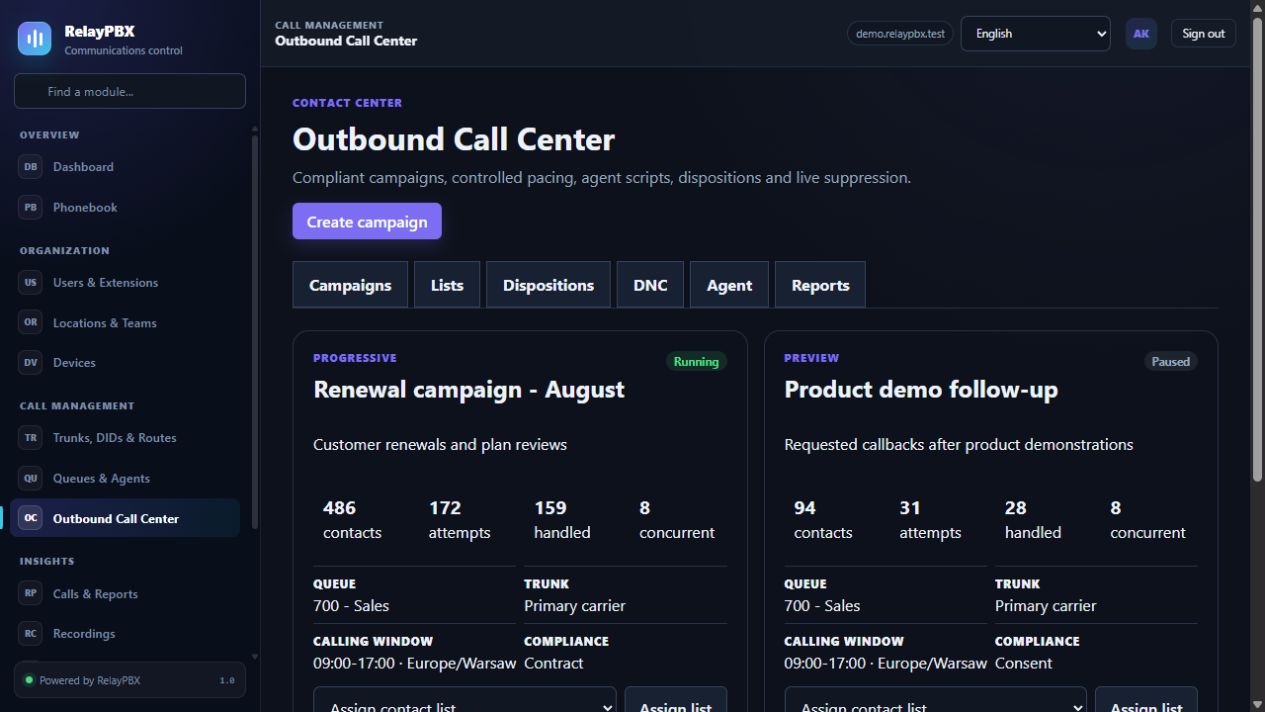
Run controlled preview and progressive calling campaigns without exposing contacts to abandoned predictive calls.
Open Call management → Outbound Call Center. The available controls depend on the active edition, module entitlement, role and tenant scope.
Before you start
Write down the current source and destination path before editing it. Keep a registered test extension, a rollback destination and Calls & Reports open for validation.
Capture the current value or export the affected records before a bulk or routing change. This gives the operator a precise comparison point and makes a supported transaction undo easier to assess.
Step-by-step workflow
Complete the steps in order. Do not combine an initial configuration with unrelated cleanup; small, attributable changes are easier to test and reverse.
- Create a contact list and import normalized numbers with the applicable consent state.
- Create a campaign, select its legal basis, queue, trunk, caller identity, timezone and calling window.
- Attach the list, assign available agents and add an agent script plus disposition group.
- Start the campaign and have agents classify every completed conversation, retry, callback or DNC request.
Field reference
Use the reference below while completing the form. Fields hidden by edition, module entitlement or role are intentionally unavailable to the signed-in user.
- Dialing mode
- Preview lets an agent request the next contact; progressive offers a call to an available agent before connecting the contact.
- Compliance basis
- Consent, contract, legitimate interest or another documented lawful basis.
- Calling window
- Allowed weekdays and local hours evaluated in the campaign and contact timezones.
- Pacing and limits
- Campaign, tenant, trunk and fraud limits checked before every attempt.
- Disposition
- Terminal, retryable, callback or DNC outcome recorded after a call.
- Do Not Call
- Tenant-wide live suppression checked again immediately before origination.
Acceptance checks
A saved record is only the beginning of validation. Run every relevant check below and retain the call-session ID, time and result when telephony is involved.
- Import one granted, one withdrawn and one duplicate number; verify the counters and suppression behavior.
- Place a preview and progressive test call, confirm the agent rings first, two-way audio works and the final result appears once in reports.
- Schedule a callback and confirm it is not attempted before the selected time or outside the contact's local calling window.
- Apply a DNC disposition and verify all ready or retrying campaign entries for that number are suppressed.
Common mistakes and safe recovery
If a check fails, stop adding changes. Restore the previous value or use a supported transaction undo, regenerate PBX configuration, then repeat the smallest failing test.
- RelayPBX does not determine whether a campaign is lawful. The customer must document the applicable legal basis and comply with local telemarketing, privacy, recording and caller-identity rules.
- Predictive dialing remains disabled until abandonment-rate measurement, jurisdiction profiles and emergency stop controls pass production acceptance.
- Never import emergency numbers, short service codes or contact lists acquired without an auditable lawful basis.
What to include in a support case
Provide the tenant, module and object name, local time with timezone, expected result, observed result and the most recent successful state. For a call problem, include the logical call-session ID and the redacted SIP/SDP text diagnostic before requesting PCAP.
Never paste passwords, private keys, raw license payloads or unredacted customer media into a ticket. Use the one-time diagnostic grant and attachment controls when support requests additional evidence.