Define scope before exporting anything
Start with an inventory that separates configuration, identity, telephony dependencies and historical data. A migration is not ready merely because the extension count is known.
- Record the source release, tenant or domain, extensions, users, devices, voicemail boxes, trunks, DIDs, routes and every call-flow module.
- List external dependencies: SIP carriers, SMTP, DNS, certificates, storage, CRM or webhook integrations, emergency routes and provisioning endpoints.
- Decide separately whether CDRs, recordings, faxes, voicemail messages and audit history are required. They are not part of the default configuration migration.
- Name the migration owner, acceptance owner, planned cutover window and rollback decision deadline.
Collect a minimal, safe source profile
Use the matching RelayPBX read-only export script against the FusionPBX PostgreSQL or VitalPBX MySQL/MariaDB source. Prefer a tenant-scoped, anonymized configuration snapshot instead of a full database dump.
- Keep CDRs, recordings, voicemail audio, private keys and password material out of the profile unless separately approved.
- Capture object counts and stable source identifiers so the dry-run report can be reconciled with the source.
- Encrypt the transfer and remove the working copy after the migration evidence is approved.
- Retain the source platform in read-only mode until the rollback window has closed.
Map dependencies and call-flow destinations
Treat the source as a dependency graph rather than a collection of rows. A DID may reach a time condition, IVR, queue, ring group, extension or voicemail, and each destination must exist before the route is accepted.
- Trace every public number to its normal, after-hours, busy, no-answer and failure destinations.
- Confirm caller ID rules, class of service, PIN authorization, feature codes and emergency routing independently from extension import.
- Flag vendor-specific scripts, dialplan fragments and integrations for manual redesign instead of silently copying them.
- Identify device models and firmware so provisioning can be tested before users are moved.
Run the dry test and close every conflict
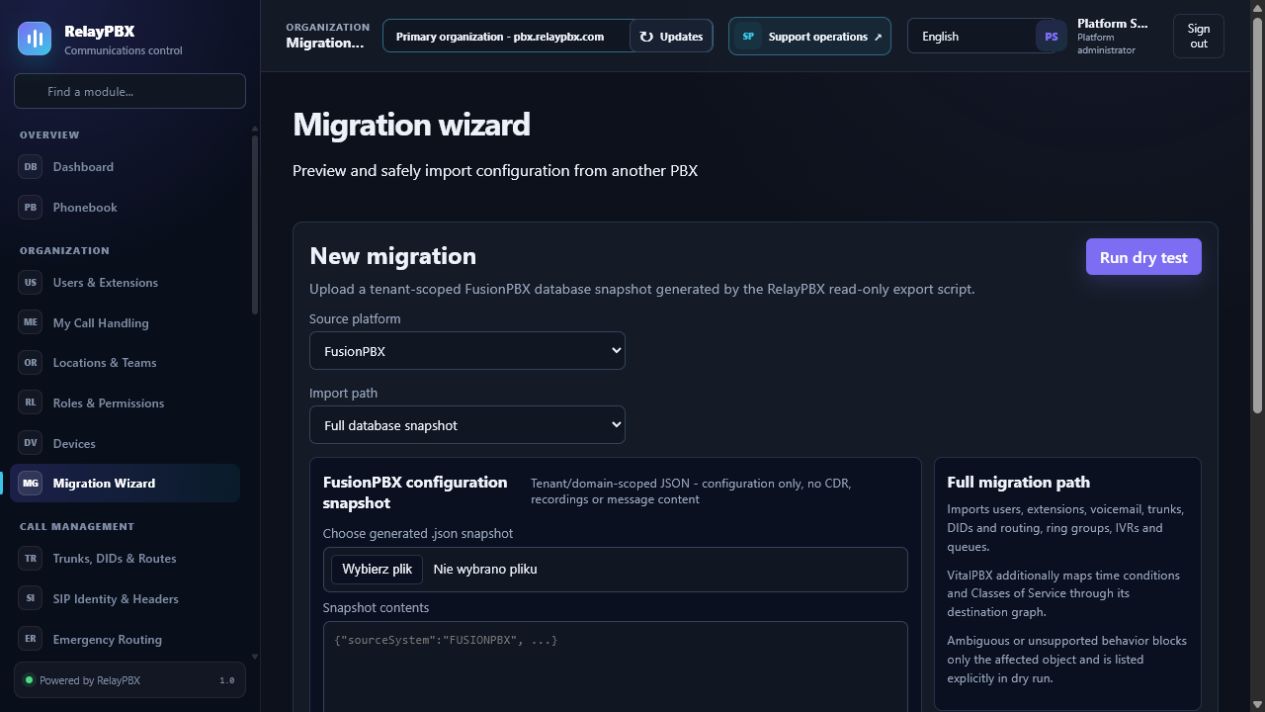
Upload the normalized snapshot, select the source platform and run the dry test. RelayPBX maps extensions, users, voicemail, trunks, DIDs and the typed destination graph without changing live configuration.
- Resolve duplicate extensions, domains and DID ownership.
- Inspect every ambiguous destination in IVRs, time conditions, ring groups and queues.
- Compare source counts with created, skipped, ambiguous, unsupported and failed projections.
- Approve every deliberate skip and assign every unsupported object to a named manual task.
Rehearse acceptance before the live cutover
Apply the accepted dry run to an isolated tenant or disposable host first. Use test trunks or blocked outbound routes so a rehearsal cannot place unintended public calls.
- Register at least two representative endpoints and verify two-way audio, DTMF, hold, transfer, voicemail and clean hangup.
- Exercise one internal call and every important inbound, outbound, after-hours, queue, IVR and failure branch.
- Check caller ID, recording policy, email notifications, fax paths and device provisioning when they are in scope.
- Verify tenant extension and concurrent-call limits, administrative roles and audit events.
- Confirm another tenant cannot read the source bundle, report or imported records.
Cut over with a tested rollback checkpoint
Create the migration checkpoint and apply only in the approved tenant and cutover window. Keep the generated report with source identifiers and target IDs, then change one traffic dependency at a time.
- Freeze source changes, take the final approved export and reconcile its counts with the accepted dry run.
- Move DNS, carrier routing or endpoint provisioning in a documented order and observe registrations plus real call paths after each change.
- Stop the cutover when an acceptance gate fails. Use the audited migration rollback action and the recorded carrier or DNS reversal plan; do not edit the database manually.
- Keep the old PBX isolated but recoverable until the agreed rollback window closes.
Close the migration with evidence
A migration is complete only when the new service is accepted, the rollback window is closed and ownership has moved to operations.
- Archive the anonymized source manifest, dry-run result, conflict decisions, final import report and acceptance evidence.
- Record remaining manual work, known deviations, support ownership and the first backup and restore-verification result.
- Revoke temporary credentials, remove working files and confirm retention for the retired source data.
- Schedule a follow-up review after real traffic has covered normal and after-hours call flows.